Before & After Photos
Click on a photo to enlarge.
Insulating an Attic in a Cabin in Cummington, MA
This customer in Cummington, MA reached out to us as the contact person at a children's music camp. He stated that they had recently built new cabins at the camp and needed to insulate them for the comfort of the campers. Our Home Comfort Specialist came out to the home and examined the cabins to formulate a plan.
We first went into the cabins and sealed all of the cracks and places where air would leak in and out. We installed baffles and used Rockwool to block parts of the eaves around the baffles. We then used a large hose to blow cellulose insulation into the attics. This will ensure that the cabins are more temperature-controlled and comfortable for the children attending this camp. The cabins will be enjoyed for years to come!
Installing a Bulkhead Door in Cummington, MA
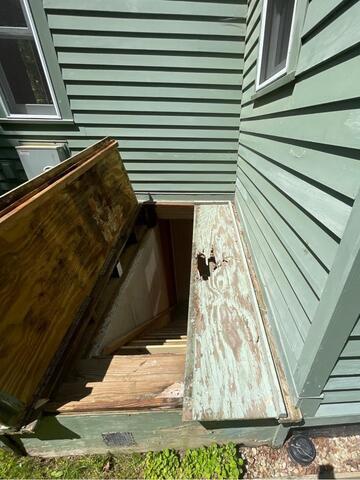
This homeowner in Cummington, MA called us saying that she needed her bulkhead door replaced. Her husband built the home, and they had a wooden bulkhead door that had been in place since it was built 10 years prior. It was rotting, and she stated she had fallen through it. She needed it replaced as soon as possible due to the hole in it.
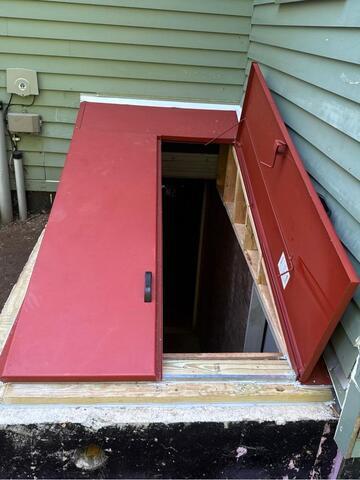
We were able to help this customer. We installed a beautiful new bulkhead door. We caulked around the edges and installed flashing behind the door to ensure a tight fit. Now, this homeowner has a new, beautiful bulkhead door that will look nice for years to come!
Insulating Walls in a Home in East Hartland, CT
This homeowner initially reached out to us saying that he wanted his attic and exterior walls insulated. Many older homes have no insulation in the exterior walls. Most homes without insulation experience cold, drafty rooms, their heating and cooling systems run much more and need more service (causing higher energy bills!), and it's difficult to keep house at a comfortable temperature.
We had the perfect solution for this homeowner. We dense packed the exterior walls using TruSoft™ cellulose insulation. His siding was removed temporarily and 29/16” holes were drilled through the wall sheathing. A fill tube was inserted up (and down) into wall cavities to not only fill, but dense pack the wall cavities. Dense packing is a technique that packs the insulation in very tightly - so tightly that all irregular shaped cavities and crevices in the wall cavities are filled, and air will not penetrate the dense packed cellulose. Dense packed cellulose stops air flow through the wall and insulates. TruSoft™ Cellulose is treated to be highly fire, mold and pest resistant. The holes were plugged and the siding was put back. Result - A less drafty, warmer, quieter, more comfortable house, less dust/pollen, house not so dry in winter, lower fuel/electric bills, heating system runs less - less maintenance.
Getting Rid of Mold and Moisture in Charlemont, MA
This homeowner had an energy audit done and the company doing the audit refused to go further upon discovery of a rather invasive mold situation. The homeowner was desperate to get to the root of the problem and get it remedied immediately. The homeowner came across our ad in a local publication and gave us a call.
The solution to fixing the problems in this home was quite a process. This home has 3 crawlspace areas that all needed to be extensively treated with MoldX2™ Cleaner and Botanical to get rid of existing mold and help to prevent future mold from growing. Each Crawlspace needed to have our Crawlspace Encapsulation System installed with Drainage Matting, TerraBlock™ Floor Insulation and SilverGlo™ Insulation on the walls. In addition, we used ZypFoam™ Closed-Cell Spray Foam Insulation around the Rim Joists in the basement and crawlspaces to properly air seal and help keep moisture out. We Installed a SmartPump™ and SmartPipe™ System in the crawlspace under the living room to eliminate water. We also installed a SaniDry™ High Performance Basement Dehumidification System in Main basement area. After removing old and replacing attic insulation with TruSoft™ Cellulose , TiteShell™ Can Light Covers and air sealing in attic, this job is a Wrap!
Performing Annual Maintenance on a Sump Pump in Charlemont, MA
This homeowner in Charlemont, MA called us after seeing our reminder about annual maintenance that we put in our newsletter. He had installed both a SaniDry XP and a sump pump in his home 4 years prior. While the SaniDry had been serviced twice prior (2 years after install and 3 years after install), the homeowner did not want the sump pump serviced either time. This means that the sump pump had not been cleaned and serviced at all since installation. This presents several issues. Like any mechanical device, sump pumps can fail -- and a failed pump for this homeowner would mean a flooded crawl space. Sand and sediment can build up in a sump pump, which can cause blocked lines.
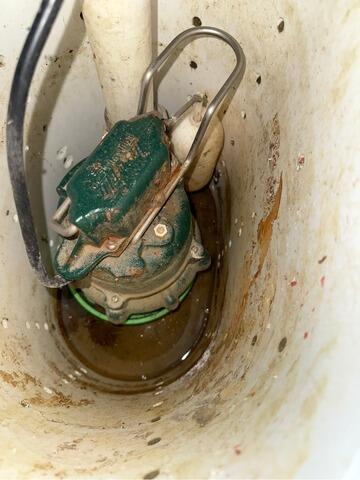
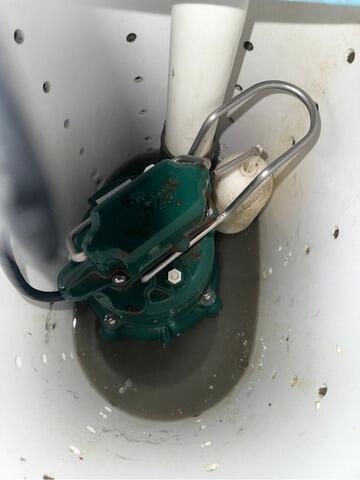
We were able to help this customer by doing maintenance on his sump pump. First, the maintenance technician inspected the crawl space the pump was located in, looking for any issues that may have occurred since we left the home. Then, the technician began testing the circuit of the outlet that the SmartSump was plugged into. He then checked to ensure the pump could run effectively. He removed the inside of the pump and cleaned it, followed by cleaning the basket. He checked the discharge lines and ensured they were not clogged. He then reassembled the pump and discharge lines. He tested the WaterWatch alarm, and then flood tested the pump. After ensuring that it was functioning, he left the home. Now, the homeowner can rest assured that their pump is working, and is clean for the first time in years!


